Stuffed Animals

As many know, I’ve been teaching children and adults knitting for quite some time.  During the children’s classes, they often choose stuffed animals to knit.  When some of my adult students saw them, they wanted to make them as well.  In response, I’ve added a 3-part class to knit stuffed animals in October.  Below are some pictures of each along with some skills that you’ll learn.  Note that any of these stuffed animals can be felted (you’ll see some examples below).  I’ve highlighted some of the patterns to choose from but there are others as well!  Go to www.knitsandthat.com/classes for more details about the class.

What a fun turtle to knit!  This pattern, written by Sarah Kupillas, is a relatively easy project worked in the round on double-pointed needles or using magic loop. You’ll learn simple decreases, seaming, and embroidering the turtle’s face.


I love this furry hedgehog (pattern from Blue’s Creations).  When felted, the eyelash yarn really shows off!  This is an easy project; you’ll learn short rows, seaming and embroidering it’s face.


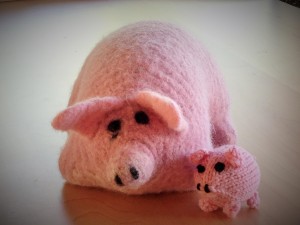
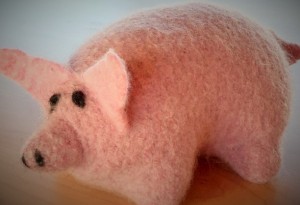
Two pigs to choose from, both easy but with lots of shaping techniques to learn.  In the photo, the large pig (pattern from Kraemer) was felted, the small one (pattern from A. Gehringer) wasn’t.  These pigs are great for practicing your finishing techniques!


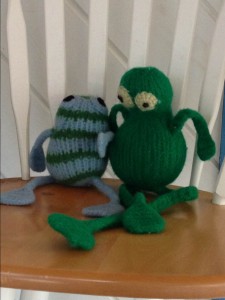
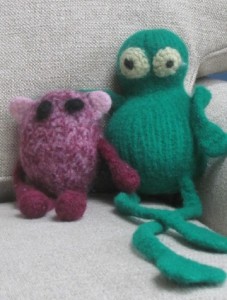
Two sizes of frogs to knit, which I felted. (I wrote these patterns, incorporating features from other patterns I liked.)  They are easy to work up, a great beginner project.  In addition to the skills from the projects listed above, you’ll learn basic crocheting for the eyes.
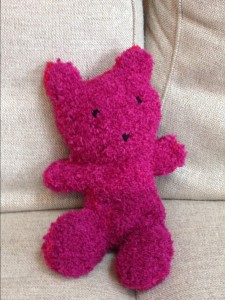


This lovable teddy bear (pattern from Berroco) is challenging to knit, mostly because of the furry yarn it uses. Lots of fun to knit though; you’ll learn short rows used for the snout, feet, and backside.


This flamingo (pattern written by Susan B. Anderson) is the perfect project for intermediate students to learn new skills.  They include short rows (to shape it’s beak), knitting in the round, invisible cast-on (Judy’s Magic Cast-on), and the picot bind-off.


This sheep is a fun, yet challenging knitting project, with lots of small details. I combined features from two patterns (one written by Elaine Simper and the other by Paton)  to make it a straightforward project but one that incorporates the loop stitch.
Children’s Summer Fiber Arts Workshops – 2014

This is my fourth year offering weekly Summer workshops for children.  I have renamed it “Fiber Arts” from “Knitting” because students will have the opportunity to learn and work on a variety of projects all related to one central theme – fiber!  The emphasis is on knitting, whether it’s introducing knitting to the beginner or advancing skills for the experienced knitter.  My workshops are tailored to each individual student; they get the opportunity to work at their own pace with help and encouragement from me and the others in the group.

What’s the perfect age for this workshop?  Typically, kids ages 7 and up come to my workshops.  They are the perfect age to begin working with fiber and learning to knit.  In my workshops, there’s always a mix of younger and older students.  I’m always amazed as to how well the various ages work together to complete each project!

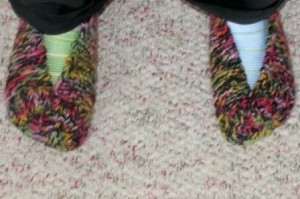
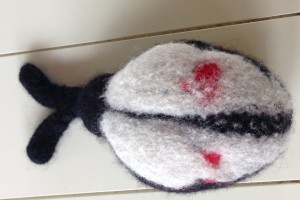
This year’s knitting projects, as in previous years, include a variety of themes.  The projects vary in size and complexity.  At the beginning of the week, I work with each student individually to help them select the project that is perfect for them!  In addition to some of the themes and projects from previous years like felted purses, knit accessories for dolls, slippers or hats, I have added some new themes and projects.  They include farm animals (stuffed pig, hippo, hedgehog) and lawn critters (butterfly, ladybug, snake).  Students can opt to have their project felted, done at the end of the week.

Everyone will go home with at least a couple of finished projects.  Pictures of some of the project choices are below.  For more information, go to www.knitsandthat.com and choose “Classes”.


Other fiber-related projects students will make include:

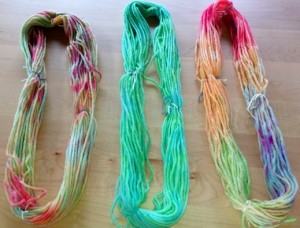
Dyeing yarn – using paintbrushes and food color — the kids mix colors, paint sections, sometimes dip their yarn into specific colors.  At the end of the week, they take home their hand-dyed yarn, which can be used after the workshop is over to knit something for themselves or as a gift!


Felting.  This Summer students will felt soap that they will be taking home using wool roving.  In addition, for knitting projects, they’ll have the opportunity to create a felted thing – stuffed animal, slippers, handbag.  They choose based on their skill level.  There are always plenty of choices!

Embroidery – Students will learn basic embroidery techniques to finish their projects, for example, french knots for a stuffed animal’s eyes, satin stitch for a mouth.

Free Lace Scarves

I’ve designed and made a few hundred free lace scarves (you can see examples of these at https://www.knitsandthat.com/catalog/scarves/wearable-art/.

I thought I’d share my experience for those of you interested in making one of your own.  It involves a lot of sewing but a simple, straight stitch can be used – a basic sewing machine works just fine!

First off, what materials will you need?  Any water-soluble fabric stabilizer will work.  I’ve tried several brands, including Sulky, but my preference is definitely Mokuba.  You can purchase Mokuba free lace kits online or at local yarn and quilting shops.  The kit contains 2 pieces:  a sticky bottom piece and a clear film to place on top.

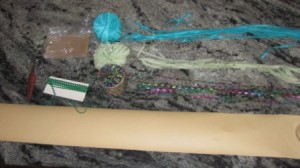
Collect ribbon, decorative yarn, fabric, or thread to make your piece – you don’t need much so scraps (or leftovers from finished projects) work great.  Hint:  I pick out one primary yarn and build the scarf with other materials that compliment its color.  I also like to use a variety of textures.


Step 1:  Lay out your piece of water-soluble fabric stabilizer on a table or other flat surface.  Make sure it is free of clutter, dirt, and wind.  Gently peel the top layer off to expose the adhesive.

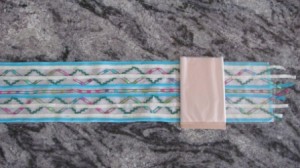
Step 2:  Slowly place your border material along the outside perimeter of the scarf, starting at the center of one long side.  I use a ribbon yarn for the outside edge, which gives it a nicely defined border.  Continue gently pressing the ribbon in place going around the entire perimeter of the scarf, ending where you started by overlapping approximately ¼”.  When placing the threads on the sticky surface, avoid touching the paper.  Remember, though, that you can always lift up and start over if you don’t like the placement.

Step 3:  Now the fun part – gently place your other yarn/threads in whatever design you’d like.  I’ve done simple straight lines, zig zags, swirls.  I like using long threads with minimal cutting, which makes it easier to sew everything in place.  If you want fringe, simply overhang the scarf ends with a length of yarn (about 8”).  After the piece is finished, if you decide against the fringe, you can simply cut it even with the scarf end.

Step 4:  Once you’re finished building your piece, line the clear film with one end of the scarf.  I find that wrapping the film over a small piece of cardboard makes this process easier to line up.  And it enables you to slowly unfold the film, ensuring it completely covers the bottom adhesive layer.


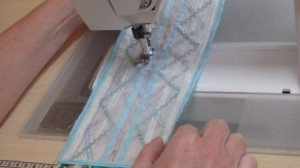
Step 5:  Sewing time!  I like using a decorative thread – my preference is a rayon “twist” thread, which twists 2 thread colors together.  This adds a nice flair to the finished scarf.  Load your sewing machine with the thread and begin sewing your scarf, centering the needle over the outside ribbon starting at the left side of one corner.  Sew all the way around the perimeter to where you began.  Then turn your work 90 degrees and sew past the corner by about 5/8” inch.  Turn again and sew the entire length of the piece.  (Make sure your needle is in the work before lifting the foot and turning.)  Continue in this fashion until the length of the scarf is sewn all the way across (separated by approximately 5/8” between each line).


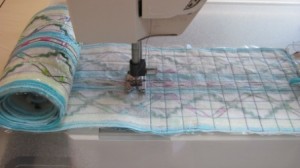
Step 8:  Now begin sewing the width of the scarf by turning the work every 5/8” inch and sewing across.  There will be places where the sewing will overlap previously sewn parts of the scarf.  Get as close to the previous line but don’t worry if it’s not right on top.


When you’re done sewing – which will take a bit of time! – tie all of your ends together in square knots.  Many times I don’t sew the entire piece in one sitting.


Step 9:  Rinse out the adhesive and film – let your finished piece sit in a basin of warm water for about 1-2 hours, periodically replacing the water.  It can take a bit of time to remove all the adhesive.  Once it is gone (you’ll know by the feel if the scarf), place a teaspoon of fabric softener in some fresh warm water and let the scarf soak for another 15 minutes.  I find that the fabric softener does a great job of softening the finished scarf making it more comfortable to wear.

Step 10:  Gently wring out the water, roll the scarf in a dry towel, and then put it on a coat hanger and hang in a sunny window until dry.  Finally, iron the scarf on a cool setting with a thin cloth placed over it.

Enjoy!

Knitting Socks

I just finished knitting my second pair of socks and until finishing them, I didn’t understand why so many knitters enjoy making them.  The gauge is small so they take longer to knit. Why not simply buy them at the store!

My first pair of knit socks came out okay but they didn’t fit perfectly (mostly because I made the heel too large and they buckle under my shoes). When I came across this yarn — Online Supersocke 100, I decided it was time to try again.

The first thing I did was get a copy of the book, “Knitting Rules” by the Yarn Harlot, Stephanie Pearl-McPhee. In addition to laughing while reading her book, I found the chapter on sock knitting to be quite helpful. I read the section “A Good, Plain Sock” which demystified the sizing of the sock leg, heel and flap, gusset, toe, etc. For this pair, I followed her “step-by-step cheat sheet for socks” with a few changes:

1. I find that I knit my socks tight so I used a Size 2 needle. When I cast on, I used the German Twisted cast-on and knit using the magic-loop technique. I find this much easier than double-pointed needles and the German Twisted cast-on gave me a nice, stretchy cuff.

2. I used Method 2 “Sturdy Heel” for making the heels — On the right side rows, I slipped one, knit one across the row. On the wrong side, I slipped the first stitch and purled the rest. I did not make the heel square, as the Yarn Harlot suggested. My finished heel is slightly wider than tall (I was probably worried about the excess fabric I had in my first pair of socks) and they fit my feet nicely.

3. Finally, for the toe, I used Ann Budd’s suggestion in her pattern for His and Hers Socks. I found that after decreasing every other row for about 2/3 of the stitches, I decreased every row for the remainder.

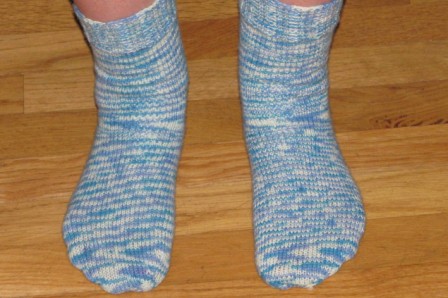
Voila!  Here are pictures of my socks.  Now I’m finally hooked and am excited to try knitting another pair.  I want to try knitting my socks 2-at-a-time and knitting them from the toe up.  I hope this information helps if you, like me, have found sock-knitting to be sometimes tricky!

Finishing techniques — sewing a zipper into a sweater

I just finished sewing another zipper into a sweater and it’s pretty easy to do. I know there are many ways of sewing a zipper to a knit fabric but I’ve been happy with this technique.

This is a Kathy Zimmerman pattern called “Anniversary Pullover” and has a turtleneck. But I knew my husband would wear it more if it had a short zipper. Thus, I modified the pattern and finished the neckline. Here’s a picture of it (I still have the sleeves to finish which I’ll be working on next.)

I purchased a 9″ zipper but it was too long; I had to adjust it because the sweater’s finished opening is only 8″. The first thing I did was pin the zipper in place. Make sure the zipper and sweater lie flat before you continue. Adjust wherever you see any puckering.

Next, I whipstitched across the zipper coil where I wanted it to end and then cut the excess. Now that the length of the zipper was right, I could begin sewing.

First, from the outside of the sweater, I sewed a running stitch starting from the top of one side and continued all the way around to the top of the other side. Keep in mind that you’ll need to fold both top edges down while sewing.

Finally, from the inside of the sweater, I stitched the outside edge of the zipper to the knit fabric. Voila! Here’s a picture showing the stitches.

Children’s Summer Knitting/Fiber Arts Workshops

Summer of 2012 will be the second year of offering week-long knitting/fiber arts workshops for children.  We meet for 3 hours a day; during that time kids learn to knit or advance their current knitting skills.  A new knitter might make a simple change purse or beanbag.  The more advanced knitter might make a lace hat or beaded knit handbag.  The setting is a relaxed one, allowing kids to advance at their own pace.  There will be many projects to choose from.  In addition to knitting, we will be needle-felting, dyeing yarn using kool-aid, and making fused glass buttons.

The perfect ages for this workshop are 7-14 year olds.  I am considering a teen-specific workshop.  If you’re interested, please let me know!

Everyone will go home with at least a couple of finished projects.  You can see photos of some projects the kids made last year below.  For more information, go to www.knitsandthat.com and choose “Classes”.


First Posting — Children’s classes

I’m so excited to start blogging about knitting and hope you’ll enjoy reading my posts. I chose, as my first post, to talk about knitting with children. Enjoy!

As many of you know, I’ve been teaching children to knit for a few years now.  It’s so inspiring to see what kids as young as 2nd graders make!  New students frequently choose as their first projects beanbags, scarves and change purses. They learn the basics of knitting (knit, purl, cast on, cast off) first. They quickly progress to knitting stripes, sewing/weaving seams, and decreasing stitches for shaping (e.g., change purse flap).

Kids who’ve been knitting for a while are challenged with increasing skills. They might make stuffed animals, lace hats, and sweater vests (for themselves or for a favorite doll). They learn to knit lace, increase stitches for shaping (e.g., arms and feet of their stuffed animals), make icord for flowers and trim.

Check out the pictures below of some of the kids who’ve taken my classes and the projects they have finished.